Ever since I was a little kid growing up in NY... One meal that I always loved was the Chili my dad would make. I remember him getting up super early and starting it up and letting it cook for a long time. We would eat it that night and it was great as a left over. Chili actually tastes better the 2nd day. No idea why. Maybe it's just me. Oh and as I got older, the last thing you wanted to smell first thing int he morning when you had a hangover, was his chili... just a side note from my memories.
As I became a dad, I wanted to share this fine recipe and meal with my boys. Of course, they won't eat it. So much for tradition. My wife loves it and we really can have it a few times during the week and is always easy to reheat.
I wish I could say the recipe was some magical family one, handed down from generation to generation... but it's really just from the New York Times cookbook.
I actually called my dad a couple years ago to get "the secret recipe". That's when the balloon was burst. NY Times. Anyway... It's awesome.
Ingredients:
3 Tablespoons of Butter or Olive Oil
1 Large Onion
2 Garlic cloves, minced
1 pound chopped beef (I use turkey)
1 1/3 cups of canned or diced tomatoes with the juice (that's equal to one 14.5 oz can)
1 green pepper, minced
1 cup water
2 tablespoons of chili powder
1 teaspoon cumin seed, crushed
1 teaspoon salt
1/2 teaspoon celery seed
1/8 teaspoon cayenne pepper
1/8 teaspoon basil
1 small bay leaf
1 can of kidney beans (drain the liquid before using or else it makes it gross and sweet)
Directions:
So the most important thing I learned was to prep.
Meaning get everything in order before you start. That way, you aren't
cursing looking for stuff while something is cooking, etc. If you have everything ready, once you start, it's just about adding. Also makes it easy to clean after.
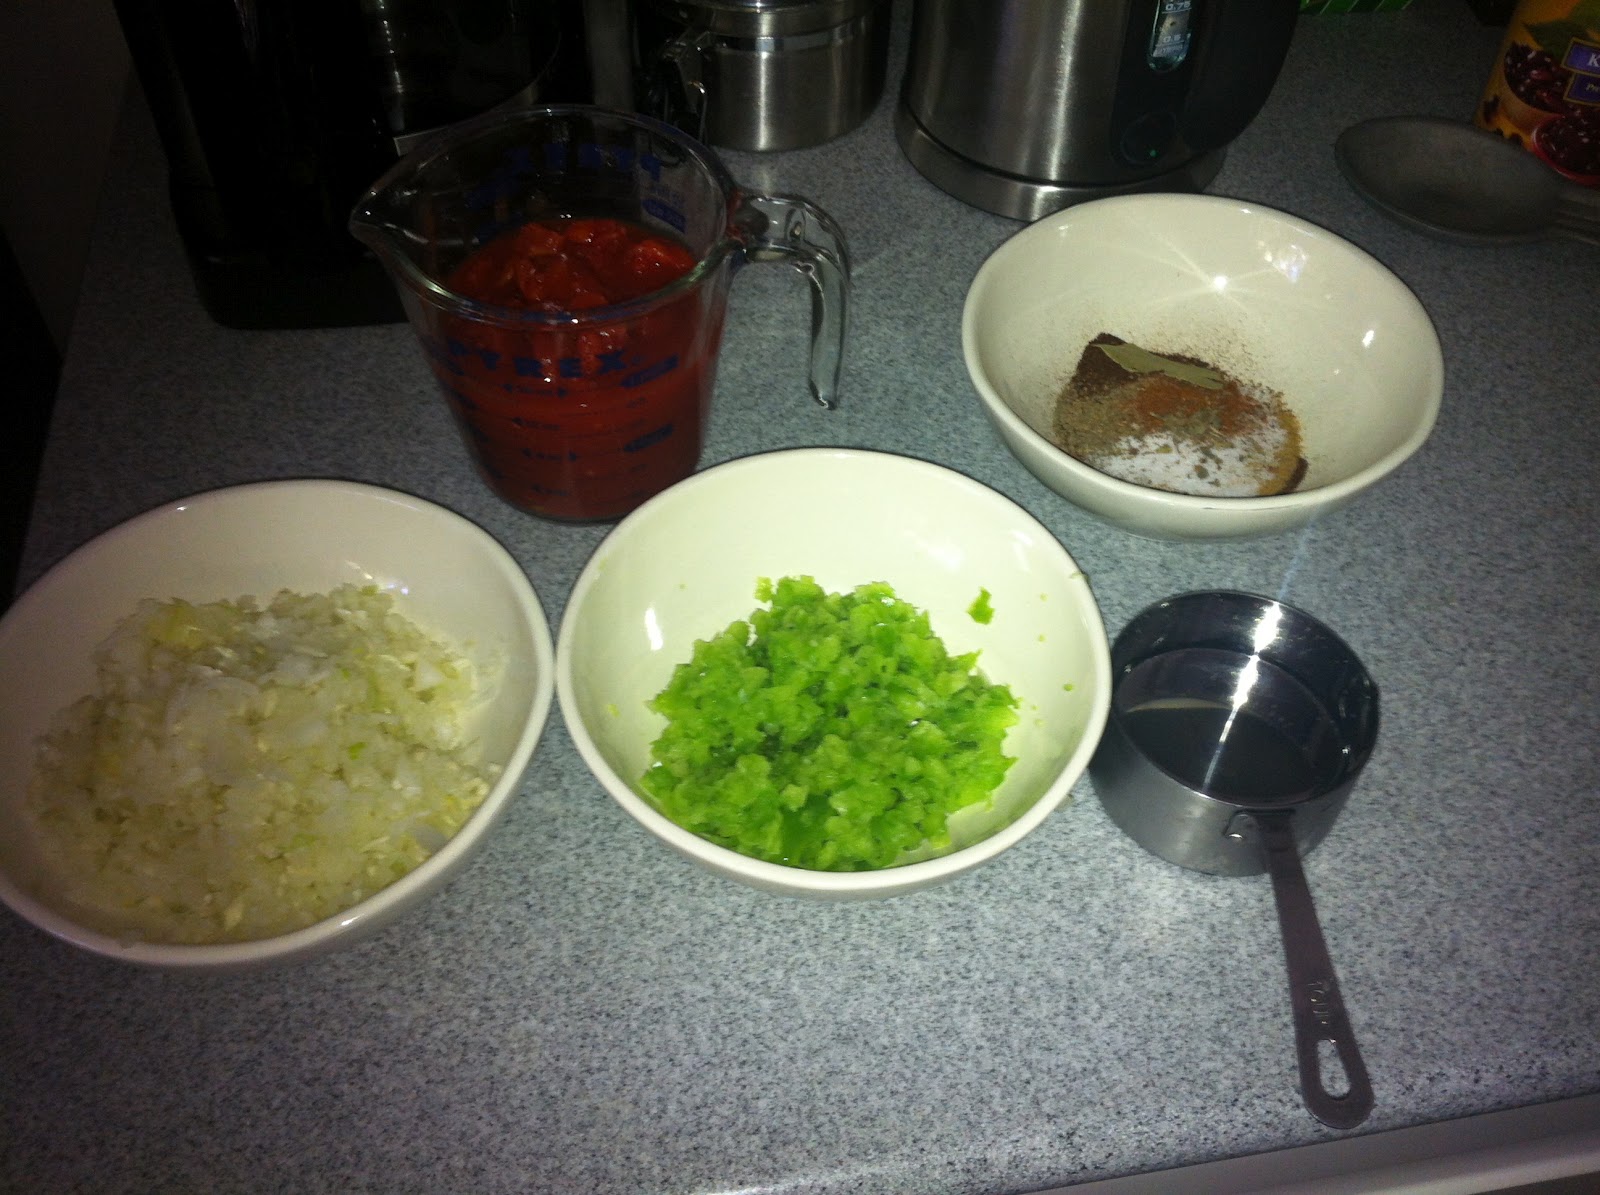
1. Mince the onion and garlic cloves and place in a dish. Mince the green pepper (I like to drain some of the juice so it's not too watery) and mix all your spices into a bowl and set aside.
2. Heat the butter or oil in a large pot. Add the onions and garlic and saute until golden brown. While this is happening and you are stirring the onions and garlic so they don't burn. In a separate pan, place your meat and brown it.
3. Once both are nice and browned, add the meat to the onion and garlic and mix them well.
4. Add the remaining ingredients to the pot and bring to a boil. Once it's boiling, reduce to a simmer and cook uncovered for 3 hours or until the sauce is as thick as you desire it to be.
5. After 3 hours or when you are satisfied with the thickness of the chili, add the can of kidney beans and cook through (about an additional 10-15 minutes on simmer.
6. That's it. Serve and eat with chips or plain. The total time this takes is about 3 hours and 15 minutes to 3 and a half hours. The prep itself is about 15 minutes, the rest is waiting. Your house will smell awesome and like I said, the meal is great on day two. If you have to make more, just double the ingredients. It never goes wrong.
Showing posts with label recipe. Show all posts
Thursday, June 7, 2012
Tuesday, June 5, 2012
Stand Up Chicken
This is one of the easiest things to make. It's healthy, delicious and everyone loves it... other than vegetarians, Sorry.
I will say, this is the one meal (as easy as it is) makes me squirm a little in the prep process. I like to pretend that food I eat was never alive once. So, the seasoning of this chicken, you can't escape the reality of what you are cooking.
As a chicken eater, I can't do bones. I don't like eating anything with bones. But, after this meal is cooked, for some reason (maybe it's how long I cook it), I don't mind.
This meal is a two step process and takes about an hour and a half.
Ingredients:
One Full Chicken
Any Season All - I use McCormick- (Now Morton) Season All Seasoned Salt
Directions
1. Preheat the oven to 350.
2. Prepare the Cookie Sheet and Stand Up Chicken holder by covering with aluminum foil. This isn't necessary, but it takes no time and will save you so much time at the end (clean up).
3. Wash the chicken thoroughly and pat it dry.
4. Cover the chicken generously with the Season All to coat the entire chicken. This includes under the wing and under the drumsticks
5. Place the chicken on the standard place in oven for 90 minutes. It should be cooked through by this point. I personally like it very crispy, so leave it in for an addition 10-15 minutes. Remove from oven.
6. When cutting the chicken, make sure to leave it on the stand. Your first cut will release a lot of juice. That's good. From there, Slice as desired and serve.
7. For a side, I live to just make some rice and corn. The kids really dig that. You can make anything really. It's chicken.
Whatever you don't use, you can just slice up and use later in a salad or as another meal later. Enjoy.
I will say, this is the one meal (as easy as it is) makes me squirm a little in the prep process. I like to pretend that food I eat was never alive once. So, the seasoning of this chicken, you can't escape the reality of what you are cooking.
As a chicken eater, I can't do bones. I don't like eating anything with bones. But, after this meal is cooked, for some reason (maybe it's how long I cook it), I don't mind.
This meal is a two step process and takes about an hour and a half.
Ingredients:
One Full Chicken
Any Season All - I use McCormick- (Now Morton) Season All Seasoned Salt
Directions
1. Preheat the oven to 350.
2. Prepare the Cookie Sheet and Stand Up Chicken holder by covering with aluminum foil. This isn't necessary, but it takes no time and will save you so much time at the end (clean up).
3. Wash the chicken thoroughly and pat it dry.
4. Cover the chicken generously with the Season All to coat the entire chicken. This includes under the wing and under the drumsticks
5. Place the chicken on the standard place in oven for 90 minutes. It should be cooked through by this point. I personally like it very crispy, so leave it in for an addition 10-15 minutes. Remove from oven.
6. When cutting the chicken, make sure to leave it on the stand. Your first cut will release a lot of juice. That's good. From there, Slice as desired and serve.
7. For a side, I live to just make some rice and corn. The kids really dig that. You can make anything really. It's chicken.
Whatever you don't use, you can just slice up and use later in a salad or as another meal later. Enjoy.
Monday, June 4, 2012
Pineapple Upside-Down Cake GF/CF
After discovering the skill of cutting a pineapple, I decided to look into other things I can do with it other than snack and use in the green juice.
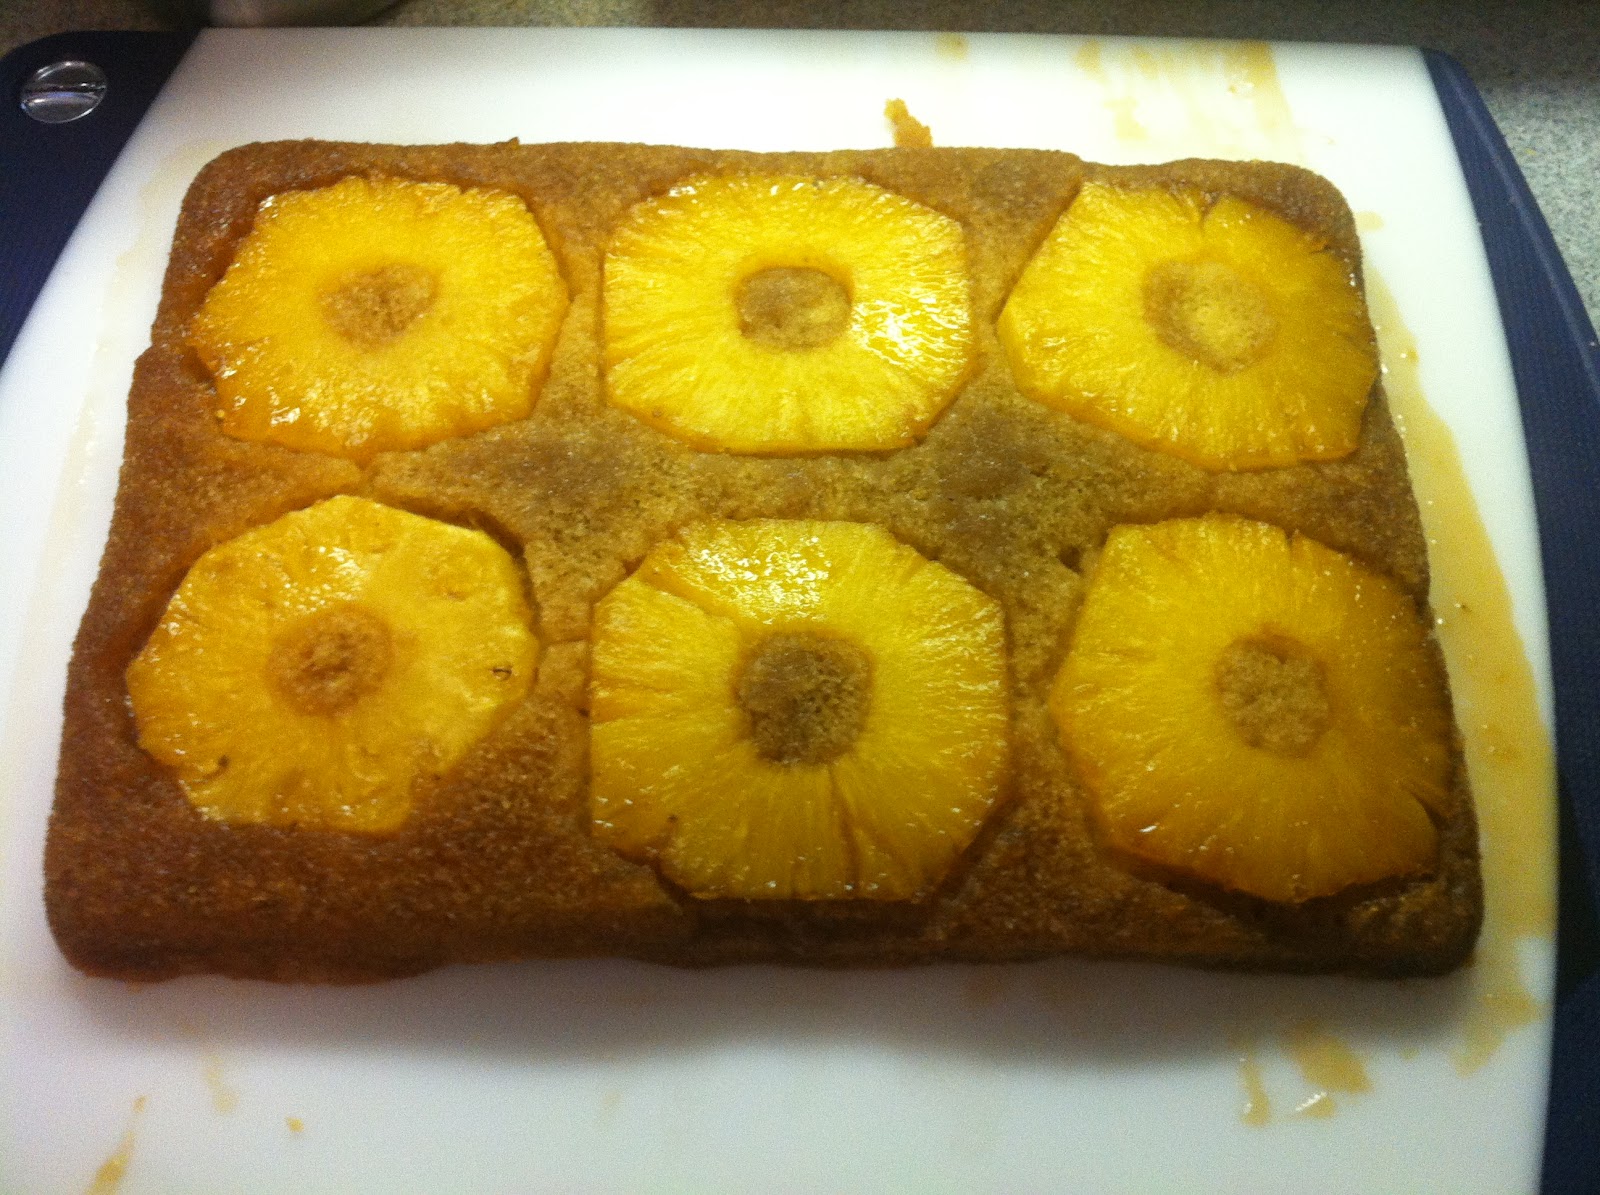
I decided to try the old Pineapple Upside-Down Cake. It was actually pretty easy. I haven't tasted it, but it looks good. I wanted to make if Gluten and Dairy free so everyone in the house could enjoy it.
Truth is, I hardly ever eat this stuff, I just need new ways to pass the day and try and impress the family.
Making things GF/CF is really easy. Betty Crocker made now make boxes for things like Yellow Cake. So that just makes the experimenting of what GF flour is best, etc...
This took no time at all. It was maybe 10-15b minutes of mixing etc and the baking was around 40 minutes. You let it cool off for around 30 minutes and can either serve it immediately or refrigerate for later.
Here's the ingredients:
1/4 cup of Butter (I use Earth Balance that comes in a stick for easy measuring)
2/3 Cup packed Brown Sugar
2 tablespoons light corn syrup
6 slices of fresh cut pineapple
6 maraschino cherries (i hate these, so opted out...your choice)
1 box (15oz) Betty Crocker Gluten Free yellow cake mix
1/2 cup butter (softened. I just put it in the mixing bowl and put in the microwave)
2/3 cup of water
2 teaspoons vanilla
3 eggs
The instructions:
1. Pre heat the oven at 350. In a 9 inch pan (I used a rectangular one). Place the 1/4 cup of butter, place it in the pan and in the oven to melt. Once melted, stir in the brown sugar and corn syrup. Spread this combo evenly in the pan. Arrange the slices of pineapple on top of the spread. If you like the cherry thing, put those in the center of the pineapple slices.
2. In the large bowl, beat the cake mix, 1/2 cup of softened butter (this is why I soften it int he microwave), water, vanilla and eggs with an electric mixer on slow for 30 seconds. Then increase the mixing speed to medium for around 2 minutes while scraping the sides so it mixes well. Pour the batter over the pineapples evenly.
3. Back the cake on the center of the oven for around 40 minutes. After 40 minutes, check if it's done by sticking a toothpick int he center and make sure it comes out smooth and clean. If it's done, remove from the oven, run a knife along the sides to make sure it's not sticking to the pan. Put a plate or cutting board (easier due to the size of the cake) and flip the cake over onto the board or place. Remember, this is hot, so make sure to use oven mittens or towels. Leave the pan on top of the cake to let the sugar topping drizzle over the cake. After 5 minutes, remove the pan and let it cool for 30 minutes.
I decided to try the old Pineapple Upside-Down Cake. It was actually pretty easy. I haven't tasted it, but it looks good. I wanted to make if Gluten and Dairy free so everyone in the house could enjoy it.
Truth is, I hardly ever eat this stuff, I just need new ways to pass the day and try and impress the family.
Making things GF/CF is really easy. Betty Crocker made now make boxes for things like Yellow Cake. So that just makes the experimenting of what GF flour is best, etc...
This took no time at all. It was maybe 10-15b minutes of mixing etc and the baking was around 40 minutes. You let it cool off for around 30 minutes and can either serve it immediately or refrigerate for later.
Here's the ingredients:
1/4 cup of Butter (I use Earth Balance that comes in a stick for easy measuring)
2/3 Cup packed Brown Sugar
2 tablespoons light corn syrup
6 slices of fresh cut pineapple
6 maraschino cherries (i hate these, so opted out...your choice)
1 box (15oz) Betty Crocker Gluten Free yellow cake mix
1/2 cup butter (softened. I just put it in the mixing bowl and put in the microwave)
2/3 cup of water
2 teaspoons vanilla
3 eggs
The instructions:
1. Pre heat the oven at 350. In a 9 inch pan (I used a rectangular one). Place the 1/4 cup of butter, place it in the pan and in the oven to melt. Once melted, stir in the brown sugar and corn syrup. Spread this combo evenly in the pan. Arrange the slices of pineapple on top of the spread. If you like the cherry thing, put those in the center of the pineapple slices.
2. In the large bowl, beat the cake mix, 1/2 cup of softened butter (this is why I soften it int he microwave), water, vanilla and eggs with an electric mixer on slow for 30 seconds. Then increase the mixing speed to medium for around 2 minutes while scraping the sides so it mixes well. Pour the batter over the pineapples evenly.
3. Back the cake on the center of the oven for around 40 minutes. After 40 minutes, check if it's done by sticking a toothpick int he center and make sure it comes out smooth and clean. If it's done, remove from the oven, run a knife along the sides to make sure it's not sticking to the pan. Put a plate or cutting board (easier due to the size of the cake) and flip the cake over onto the board or place. Remember, this is hot, so make sure to use oven mittens or towels. Leave the pan on top of the cake to let the sugar topping drizzle over the cake. After 5 minutes, remove the pan and let it cool for 30 minutes.
Tuesday, May 22, 2012
Grilled Chicken and Rice with Peas - Easy Dinner!
Here's a real easy and healthy meal that I could eat every night. It's real simple and takes 20 minutes to cook and maybe 5 minutes prep time.
Grilling chicken is the healthiest way to eat it, the rice is not so healthy, but fuck it. The kids love this.
Ingredients
For Rice:
1 cup of white rice
2 cups of water
approx 1/2 tablespoon of olive oil
pinch of salt
Peas:
Frozen peas
Water
For Chicken:
2 Chicken breasts (or more depending on how many are eating)
salt
pepper
Step 1 - Put one cup of rice in a pot. Cover with 2 cups of water. Add the oil and salt.
Bring to a boil and cover. Let this cook for 20 minutes. While the rice is cooking, get the chicken and peas going.
Step 2 - Pound the chicken to thin it out (makes it easier to cook through), trim the fat and gross bits. Salt and pepper as desired.
Step 3 - Use Olive Oil to coat your grill pan. Have heat on high and place salt and peppered sides down first. Salt and pepper the rest of the chicken. At the same time, set the peas on the stove and bring to a boil.
Step 4 - Everything is cooking at the same time. Peas are boiling (take them off after 5 minutes of boiling and strain), Rice is cooking and the chicken is cooking. Flip the chicken after around 6 minutes to cook both sides.
Step 5 - After 20 minutes are up, turn off the chicken, uncover the rice and pour the peas into the rice pot and mix. I add a little butter (I use Earth Balance, butter substitute) to flavor it all a little more. Mix them up and let it sit for a minute.
Step 6 - Serve the rice on a plate and place the chicken for a nice presentation (to yourself). For the kids, I cut it up and mix it in.
I love this dish and it couldn't be easier. Any leftover rice, just put away and reheat at a later time. You can do it all over again, this time just cooking a chicken breast.
Grilling chicken is the healthiest way to eat it, the rice is not so healthy, but fuck it. The kids love this.
Ingredients
For Rice:
1 cup of white rice
2 cups of water
approx 1/2 tablespoon of olive oil
pinch of salt
Peas:
Frozen peas
Water
For Chicken:
2 Chicken breasts (or more depending on how many are eating)
salt
pepper
Step 1 - Put one cup of rice in a pot. Cover with 2 cups of water. Add the oil and salt.
Bring to a boil and cover. Let this cook for 20 minutes. While the rice is cooking, get the chicken and peas going.
Step 2 - Pound the chicken to thin it out (makes it easier to cook through), trim the fat and gross bits. Salt and pepper as desired.
Step 3 - Use Olive Oil to coat your grill pan. Have heat on high and place salt and peppered sides down first. Salt and pepper the rest of the chicken. At the same time, set the peas on the stove and bring to a boil.
Step 4 - Everything is cooking at the same time. Peas are boiling (take them off after 5 minutes of boiling and strain), Rice is cooking and the chicken is cooking. Flip the chicken after around 6 minutes to cook both sides.
Step 5 - After 20 minutes are up, turn off the chicken, uncover the rice and pour the peas into the rice pot and mix. I add a little butter (I use Earth Balance, butter substitute) to flavor it all a little more. Mix them up and let it sit for a minute.
Step 6 - Serve the rice on a plate and place the chicken for a nice presentation (to yourself). For the kids, I cut it up and mix it in.
| Kids Plate |
| Adult Plate |
I love this dish and it couldn't be easier. Any leftover rice, just put away and reheat at a later time. You can do it all over again, this time just cooking a chicken breast.
Easy Spaghetti...
Here's another easy 10 minute recipe for a quick healthy meal for you and the kids (if you have kids)...
This is another GFCF recipe. If you don't care, use regular pasta.
Ingredients
1. Ground Turkey (or beef...your choice)
2. Mrs Gooch's Red Pasta Sauce (or whatever brand you like)
3. Brown Rice Pasta (Spaghetti) or regular if you don't care about GFCF
5. Serve and that's it.
Total cooking time, 10 minutes. Total time all together, maybe 15.
This is another GFCF recipe. If you don't care, use regular pasta.
Ingredients
1. Ground Turkey (or beef...your choice)
2. Mrs Gooch's Red Pasta Sauce (or whatever brand you like)
3. Brown Rice Pasta (Spaghetti) or regular if you don't care about GFCF
1. In a sauce pan, place the meat (amount depends on how many you are cooking for), have the heat on high and just brown it all. Keep mixing it around to brown all sides.
2. While browning the meat, have a pot of water boiling for the spaghetti. Salt the water (pinch) and add olive oil (a splash). Once the meat is browned, add tomato sauce. Enough to cover. If you like if with more sauce, add more. Your personal decision. Continue mixing.
3. When the water is boiling, add the spaghetti. Allow the spaghetti to cook for about 10 minutes. Stir the water to make sure the spaghetti cooks thoroughly. While the spaghetti is cooking, continue to stir the sauce.
4. After 10 minutes, both are done. Drain the spaghetti and then in a large bowl, mix both together.
Total cooking time, 10 minutes. Total time all together, maybe 15.
Sunday, May 20, 2012
Banana Bread GFCF
On weekends, you really have to fill up time entertaining the kids. So with the boys I try to do stuff to keep them occupied. So baking is one thing that they can get into. all the measuring, mixing and eating... plus, it makes you look like you do stuff to a wife, who most likely thinks you just watch TV.
I found this GFCF recipe for banana bread that is pretty good. You can pick at it throughout the week.
This takes about 10 minutes to prepare and anywhere between 30-45 minutes to cook.
WASH YOUR HANDS
The Ingredients (this is for GFCF...If you don;t care, just got with regular stuff)
4 Eggs
4 or 5 Ripe Bananas
1 cup Sugar
1/2 cup Apple Sauce
1 tsp Vanilla Extract
2 Cups Brown Rice Flour (or regular if you don't care about GFCF)
1 tsp Baking Soda
1/2 tsp Salt
1/3 cup melted Butter (I use Earth Balance fake butter)
Instructions
1. Preheat oven to 350
2. In a mixing bowl, beat eggs lightly
3. Add mashed bananas (used your clean hands mash), sugar, apple sauce and Vanilla
4. Mix thoroughly.
7. Add flour to the wet mixture, and make sure mix so it's all wet
8. Use the melted butter to coat the loaf pans, then fold in the remaining butter into the mixture
9. Pour the batter evenly in both greased pans
10. Place both pans int he preheated oven and bake at 350 for any where between 30-45 minutes
11. At around 30 minutes, start checking to make sure if it's cooked. Use a toothpick and poke the center. if the toothpick comes out clean, its done, if not, keep checking every few minutes
12. When the center is clean, take them out and let them cool on the counter for 10-20 minutes
13. After hey have cooled, be careful when removing from the pans. flip them upside down and tap the bottom until they drop.
14. Use a bread knife and slice and serve.
I found this GFCF recipe for banana bread that is pretty good. You can pick at it throughout the week.
This takes about 10 minutes to prepare and anywhere between 30-45 minutes to cook.
WASH YOUR HANDS
The Ingredients (this is for GFCF...If you don;t care, just got with regular stuff)
4 Eggs
4 or 5 Ripe Bananas
1 cup Sugar
1/2 cup Apple Sauce
1 tsp Vanilla Extract
2 Cups Brown Rice Flour (or regular if you don't care about GFCF)
1 tsp Baking Soda
1/2 tsp Salt
1/3 cup melted Butter (I use Earth Balance fake butter)
Instructions
1. Preheat oven to 350
2. In a mixing bowl, beat eggs lightly
3. Add mashed bananas (used your clean hands mash), sugar, apple sauce and Vanilla
4. Mix thoroughly.
5. Melt butter in a saucepan. You will use this in the mix as well as to grease your loaf pans
6. Prepare flour, salt and baking soda in another bowl. Mix them up.
9. Pour the batter evenly in both greased pans
10. Place both pans int he preheated oven and bake at 350 for any where between 30-45 minutes
11. At around 30 minutes, start checking to make sure if it's cooked. Use a toothpick and poke the center. if the toothpick comes out clean, its done, if not, keep checking every few minutes
12. When the center is clean, take them out and let them cool on the counter for 10-20 minutes
13. After hey have cooled, be careful when removing from the pans. flip them upside down and tap the bottom until they drop.
14. Use a bread knife and slice and serve.
Saturday, May 19, 2012
Gluten Free Chocolate Chip Pancakes
I mentioned earlier that I have my kids on a GF/CF diet.
6 years ago, it was a horrible diet to try. Today, almost everything is easy to find. In this particular case, Bisquick has made breakfast easy for a GFCF diet. If you don't care about GF/CF, just use regular Bisquick and regular milk.
This is a good, fun thing to do with my 9 year old too.
The Ingredients for 4 large Pancakes:
1 cup of Gluten Free Bisquick
1 Egg
1 cup of Almond Milk
2 tablespoons of vegetable oil
8 Semi Sweet Chocolate Chips (these are dairy free). I get them from Trader Joes.
I use a 4 cup glass measuring cup to mix the ingredients. It's easy and also makes it real easy to pour on the griddle.
I mix them all in there and then pour it on the griddle.
Once they are poured on the greased griddle (I use Earth Balance Butter Spread), I add the chips. About 6-8 on each pancake. Let them cook until they bubble, then flip them.
Once they are done, just serve and enjoy. The chocolate chips keep you from having to add syrup, which is just a ton of sugar... Semi Sweet chips are sweet enough.
6 years ago, it was a horrible diet to try. Today, almost everything is easy to find. In this particular case, Bisquick has made breakfast easy for a GFCF diet. If you don't care about GF/CF, just use regular Bisquick and regular milk.
This is a good, fun thing to do with my 9 year old too.
The Ingredients for 4 large Pancakes:
1 cup of Gluten Free Bisquick
1 Egg
1 cup of Almond Milk
2 tablespoons of vegetable oil
8 Semi Sweet Chocolate Chips (these are dairy free). I get them from Trader Joes.
I use a 4 cup glass measuring cup to mix the ingredients. It's easy and also makes it real easy to pour on the griddle.
I mix them all in there and then pour it on the griddle.
Once they are poured on the greased griddle (I use Earth Balance Butter Spread), I add the chips. About 6-8 on each pancake. Let them cook until they bubble, then flip them.
Once they are done, just serve and enjoy. The chocolate chips keep you from having to add syrup, which is just a ton of sugar... Semi Sweet chips are sweet enough.
Green Juice
About 6 months ago, I went to visit my friend Will. Will is always positive, energetic and just the best person you want to see when feeling like you need to just hang with a friend.
Will is a single and a great stay at home Dad.
When I got to his house, the first thing I noticed was how he looked young and had extra energy. I complemented him on this and he excitedly said "it's this juice"... Now, in my world a good "juice" would be a great strain of weed. But, this was real juice. He then said "you want one"?
Well, since that day, I drink 2 large glasses of this a day. I must say, I feel great all the time and when I don't drink it, I feel shitty.
I thank Will for introducing me to this concoction that keeps me going. Whether you are a dad or a single guy, this is a great way to start the day. It takes a total of maybe 5 minutes.
I go organic. If you are going to do it, might as well avoid the shit they spray on stuff these days.
The Ingredients:
1 cup Fresh Strawberries
1/2 cup of fresh Blueberries
1/2 cup of Pineapple (this could be melon, watermelon, mango or whatever you desire)
1 cup fresh Spinach
6 springs of fresh parsley
1 cup Coconut Water
1/2 cup Orange Juice
1 Tablespoon Flax seed Oil
1 Tablespoon Chia Seed
Make sure you wash everything. Place it all into a blender that can liquefy all these ingredients. I bought the Chefscape PBL1000. It was a little pricey, but I can say, I use it enough to where that's OK with me.
Put them all the ingredients in the blender and hit the button!
Will is a single and a great stay at home Dad.
When I got to his house, the first thing I noticed was how he looked young and had extra energy. I complemented him on this and he excitedly said "it's this juice"... Now, in my world a good "juice" would be a great strain of weed. But, this was real juice. He then said "you want one"?
Well, since that day, I drink 2 large glasses of this a day. I must say, I feel great all the time and when I don't drink it, I feel shitty.
I thank Will for introducing me to this concoction that keeps me going. Whether you are a dad or a single guy, this is a great way to start the day. It takes a total of maybe 5 minutes.
I go organic. If you are going to do it, might as well avoid the shit they spray on stuff these days.
The Ingredients:
1 cup Fresh Strawberries
1/2 cup of fresh Blueberries
1/2 cup of Pineapple (this could be melon, watermelon, mango or whatever you desire)
1 cup fresh Spinach
6 springs of fresh parsley
1 cup Coconut Water
1/2 cup Orange Juice
1 Tablespoon Flax seed Oil
1 Tablespoon Chia Seed
Make sure you wash everything. Place it all into a blender that can liquefy all these ingredients. I bought the Chefscape PBL1000. It was a little pricey, but I can say, I use it enough to where that's OK with me.
Put them all the ingredients in the blender and hit the button!
Mix it up
And there you have it.
It makes about 2 large glasses. I drink the m both back to back. If they sit too long,
it will get think and kind of gross. You will be pretty full for the entire morning.
My 2 year old loves it too.
Friday, May 18, 2012
Gluten and Dairy Free Pizza
My older son is on a Gluten and Dairy free diet. When we first started this diet back in 2004, I have to tell you. It sucked. It was so hard to find food, recipes and anyone giving tips on how to do it. Today, it's real easy. The prepared foods are pretty good and it's real easy to make alternatives to meals for kids on the GFCF diet.
I make this pizza that is super easy and easy to buy the ingredients. Granted, GFCF is a little more expensive, but the benefit is also healthier.
I always found it interesting that if you want to eat well, take car of yourself and support local farms and organic farms, you get punished financially... hmmm... that's a whole other topic.
Anyway, here is the easy 10 minute 3 step process of how to make a pizza.
3 Ingredients
1. Udi's Gluten Free Pizza Crust
2. Mrs. Gooch's Pasta Sauce (plain red sauce) - This is my personal favorite... you can use any kind obviously
3. Daiya Dairy Free Mozzarella Style Sheds (You can use this for quesadillas and anything you want to melt)
1. Pre-heat your oven to 375 degrees
2. Take a Pizza crust, pour pasta sauce on it and spread evenly.
3. Cover pizza with Daiya cheese (be generous)
4. Place pizza on top rack and cook for 7 minutes
5. After 7 minutes, put the oven at broil and melt cheese as desired
6. You should be done in 10 minutes
7. Remove and cool.
8. Cut as desired.
9. Eat it up!
I make this pizza that is super easy and easy to buy the ingredients. Granted, GFCF is a little more expensive, but the benefit is also healthier.
I always found it interesting that if you want to eat well, take car of yourself and support local farms and organic farms, you get punished financially... hmmm... that's a whole other topic.
Anyway, here is the easy 10 minute 3 step process of how to make a pizza.
3 Ingredients
1. Udi's Gluten Free Pizza Crust
2. Mrs. Gooch's Pasta Sauce (plain red sauce) - This is my personal favorite... you can use any kind obviously
3. Daiya Dairy Free Mozzarella Style Sheds (You can use this for quesadillas and anything you want to melt)
1. Pre-heat your oven to 375 degrees
2. Take a Pizza crust, pour pasta sauce on it and spread evenly.
3. Cover pizza with Daiya cheese (be generous)
4. Place pizza on top rack and cook for 7 minutes
5. After 7 minutes, put the oven at broil and melt cheese as desired
6. You should be done in 10 minutes
7. Remove and cool.
8. Cut as desired.
9. Eat it up!
Subscribe to:
Posts (Atom)